Welcome | Get started | Dive | Contribute | Topics | Reference | Changes | More
Install your Lino developer environment
(1) This document describes how to install a Lino developer environment on your computer.
Create a virtualenv
(2) In order to keep Lino separate from your system-wide Python, you will first install a virtualenv and then install Lino into this environment.
- virtualenv
A virtual Python environment. A directory tree containing a stand-alone Python installation where you can install and remove packages without modifying your computer system’s Python installation.
(3) If you haven’t yet used virtualenvs, you must first install the required Linux system packages:
$ sudo apt-get install python3-venv  # Debian
$ sudo dnf install python3-virtualenv  # RedHat
(4) We suggest to install Lino under ~/lino, and throughout
this guide we assume that you did so. You may choose another name, just don’t
forget to adapt our examples as needed.
(5) Here we go:
$ cd   # go to your home directory
$ mkdir lino
$ python3 -m venv lino/env
$ . lino/env/bin/activate
(6) The dot (.), which is also known as the source command,
executes the content of the specified file in the current shell, as if you would
type them in the terminal. If you didn’t know this, read the manpage.
(7) One last thing before we actually install Lino: The effect of
executing the activate script is temporary. It counts only for the
terminal where you launched it. And you probably don’t want to type
. lino/env/bin/activate each time you open a new terminal. So let’s add this
line to your .bashrc file.
- .bashrc
A bash script that gets executed each time you open a terminal on your computer.
(8) Here we go:
$ nano .bashrc
(9) nano is a text editor. We’ll talk about text editors later,
right now we recommend the nano editor, which is installed out of the box
on most Linux systems.
(10) Hit Ctrl+End to jump to the end of the file, then hit Shift+Ins to paste the following line of text:
. ~/lino/env/bin/activate
(11) Hit Ctrl+X to exit nano and answer y when
nano asks whether you want to save the file.
(12) The virtualenv in ~/lino/env is now your default
environment.
- default environment
The default virtualenv you use when developing.
(13) Make sure that your default environment is correctly set:
Close your terminal
Reopen a new one
Type
which python:$ which python /home/joe/lino/env/bin/python
The output should be equivalent of above. If there is no output, or if the output is
/usr/bin/python3, then something went wrong.
(14) The which command prints the full path of the executable
file that would get executed if you typed the given command without the
“which”.
(15) Warning: a typical source of problems for newbies is to not pay attention at which virtualenv they have activated. Read More about virtualenvs below if the topic is new to you.
Install and run getlino
(16) Install getlino into your default environment:
$ pip install getlino
(17) Now run getlino configure with the following options:
$ getlino configure --clone --devtools --appy --redis
(18) It asks a lot of questions, but you can hit ENTER for each
of them. When it does not react to ENTER but asks a [y or n]
question, then make sure to read the question and understand it before you hit
y. For details about each question or if something doesn’t work as
expected, see Remarks below or the documentation about getlino : the Lino installer.
(19) The process of cloning the repositories takes some time. Lino is a whole little collection of repositories and applications! See Repositories of the Lino framework if you are curious. You don’t need to dive into each of them right now, but you must at least install them so that your environment is complete.
(20) When getlino has finished, you must add yet another line of text to
your .bashrc file:
$ cd # go to your home directory
$ nano .bashrc
(21) Hit Ctrl+End to jump to the end of the file, below the line
. ~/lino/env/bin/activate (which we created in the last section), then hit
Shift+Ins to paste the following line of text:
. ~/.lino_bash_aliases
(22) Close your terminal and reopen a new one in order to activate this change.
(23) The ~/.lino_bash_aliases file installs several shell
commands, we will have a deeper look at them in the next sections.
The go command
(24) When working on Lino we often use nicknames for well-known directories in the Lino development environment. Examples of nicknames are “lino”, “polly”, “noi”, “cosi” or “book”.
(25) And we use a shell command named go for jumping around
between these directories. For example, try whether the following works also in
your terminal:
$ go lino
$ pwd
/home/joe/lino/env/repositories/lino
$ go polly
$ pwd
/home/joe/lino/env/repositories/book/lino_book/projects/polly
(26) The bash command pwd means “print working directory” and
simply prints the name of the current working directory to the terminal. Saying
go lino is equivalent of saying cd
/home/joe/lino/env/repositories/lino.
(27) There are two “types” of nicknames:
lino,bookornoiare repositories.polly,cosi1ornoi2are demo projects
Run the polly demo project
(28) A Lino developer environment comes with a lot of demo projects, which we use for testing, demonstrating and explaining Lino.
- demo project
A Django project directory (i.e. a directory with at least two files
settings.pyandmanage.py), that you can run out of the box.
(29) Let’s try one of the demo projects, for example “polly”:
$ go polly
$ pm prep -b
`initdb std demo feedback compass demo2` started on database /home/luc/lino/env/repositories/book/lino_book/projects/polly/settings/default.db.
No changes detected
Operations to perform:
Synchronize unmigrated apps: about, gfks, jinja, lino, polls, printing, react, staticfiles, system, users, xl
Apply all migrations: contenttypes, sessions
Synchronizing apps without migrations:
Creating tables...
Running migrations:
Applying contenttypes.0001_initial... OK
Applying contenttypes.0002_remove_content_type_name... OK
Applying sessions.0001_initial... OK
Loading data from /home/luc/xxx/env/repositories/lino/lino/modlib/system/fixtures/std.py
...
Loading data from /home/luc/xxx/env/repositories/xl/lino_xl/lib/polls/fixtures/demo2.py
Installed 22 object(s) from 8 fixture(s)
(30) The pm is a shell alias for python manage.py, which
is also called a django-admin command. The pm prep command
“prepared” the demo database by creating an empty database and filling fictive
demo data into it.
(31) Now the database for polly is “prepared” and we can run a web
server on it. There is another django-admin command runserver for doing
this:
$ pm runserver
Watching for file changes with StatReloader
Performing system checks...
System check identified no issues (0 silenced).
July 19, 2025 - 14:05:50
Django version 5.2.4, using settings 'lino_book.projects.polly.settings.demo'
Starting development server at http://127.0.0.1:8000/
Quit the server with CONTROL-C.
WARNING: This is a development server. Do not use it in a production setting. Use a production WSGI or ASGI server instead.
For more information on production servers see: https://docs.djangoproject.com/en/6.0/howto/deployment/
(32) Point your browser to http://localhost:8000 and you should see something like the following:
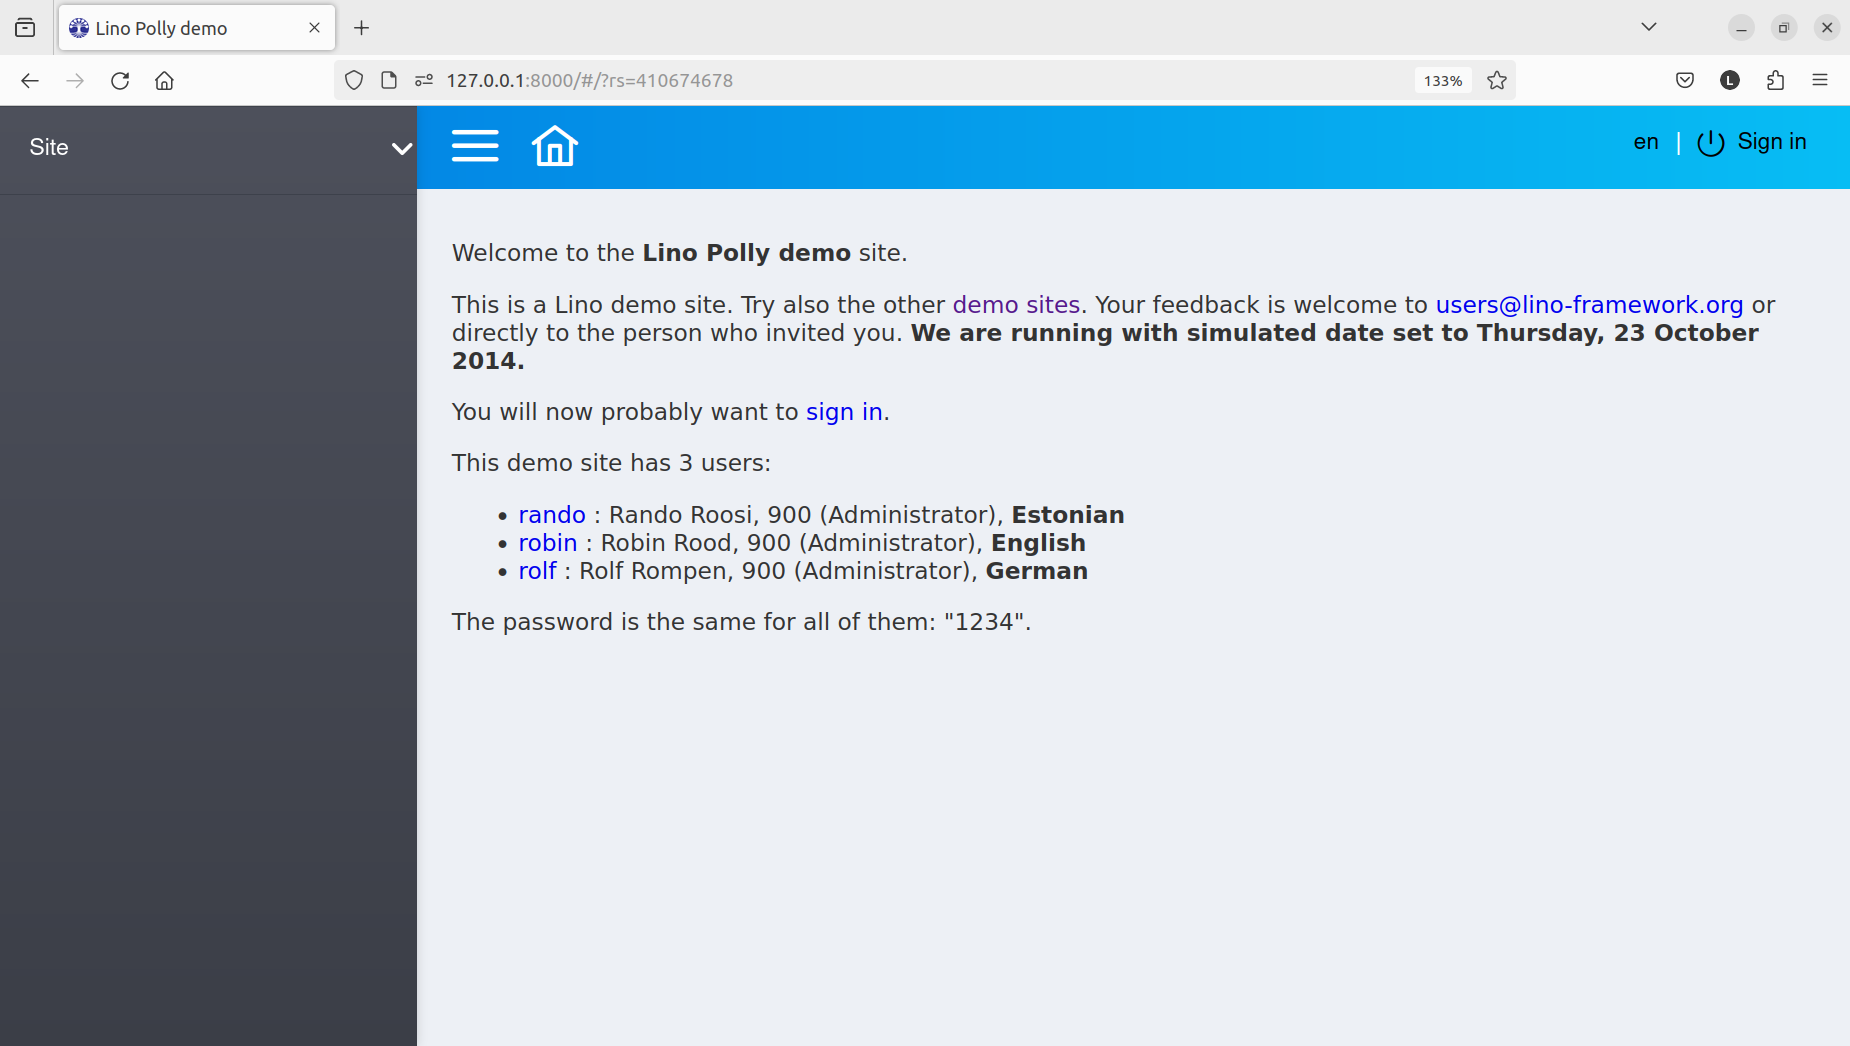
(33) If you get this screen, please have a break and discover this little website, which is a simple but real Lino site. Try to create a new poll with a few funny questions.
(34) After playing on the polly site, please read the following page of our User Guide: Lino basics.
Remarks
(35) The shell commands go, pm and runserver are
defined in the .lino_bash_aliases file. More about them in
Bash aliases installed by getlino.
(36) polly is the nickname of a demo project. We will
discover more demo projects in Discover some demo projects. Before starting a development
server on a demo project for the first time, you must initialize its database
using the pm prep command.
More about getlino
(37) The getlino script does a lot of work. These commands take some time when you run them the first time on your machine because they will download and install all Python packages needed by Lino. If you install them a second time into another environment, the process will be quicker because pip caches the downloaded packages.
(38) languages (The languages to set on new sites) [en]: This is
just the default value that getlino will put for languages in the settings.py of new sites.
(39) In some circumstances getlino will say “The following command was not executed because you cannot sudo”, followed by an “apt-get install” command. Consider running these commands manually.
(40) In case you have used getlino on your machine before (maybe in another virtualenv, but on the same machine), then you might want to delete your configuration files before installing again:
$ rm ~/.getlino.conf
$ sudo rm /etc/getlino/getlino.conf
(41) The --appy option tells getlino configure to install a
LibreOffice server on your machine. Some of the demo examples use
lino_xl.lib.appypod for producing printable pdf files. That’s why you
need a LibreOffice server on your system. Details about what getlino does are
described in More about the LibreOffice service.
(42) Until 2021 our repositories were hosted on GitHub. In March 2021 we started to move to GitLab. Check Moving from GitHub to GitLab when in doubt whether your clone is up to date.
More about virtualenvs
(43) Using virtual environments can be a challenge. Here are some diagnostic tricks.
(44) You can deactivate a virtual environment with the command
deactivate. This switches you back to your machine’s system-wide
environment.
(45) You can switch to another virtualenv simply by activating it, you don’t need to deactivate the current one first.
(46) You should never rename a virtualenv (they are not designed for that), but you can easily create a new one and remove the old one.
(47) To learn more, read Dan Poirier’s post Managing multiple Python projects: Virtual environments where he explains what they are and why you want them.
(48) After creating a new environment, you should always update pip and setuptools to the latest version:
$ pip install -U pip setuptools
Collecting pip
Using cached https://files.pythonhosted.org/packages/43/84/23ed6a1796480a6f1a2d38f2802901d078266bda38388954d01d3f2e821d/pip-20.1.1-py2.py3-none-any.whl
Collecting setuptools
Downloading https://files.pythonhosted.org/packages/8e/11/9e10f1cad4518cb307b484c255cae61e97f05b82f6d536932b1714e01b47/setuptools-49.2.0-py3-none-any.whl (789kB)
100% |████████████████████████████████| 798kB 1.1MB/s
Installing collected packages: pip, setuptools
...
Successfully installed pip-20.1.1 setuptools-49.2.0
(49) How to see which is your current virtualenv:
$ echo $VIRTUAL_ENV
/home/joe/lino/env
(50) Or this variant is almost equivalent but easier to remember:
$ which python
/home/joe/lino/env/bin/python
(51) How to see what’s installed in your current virtualenv:
$ pip freeze
The output will be about 60 lines of text, here is an excerpt:
alabaster==0.7.9
appy==0.9.4
argh==0.26.2
...
Django==1.11.2
...
future==0.15.2
...
-e git+git+ssh://git@github.com/lino-framework/lino.git@91c28245c970210474e2cc29ab2223fa4cf49c4d#egg=lino
-e git+git+ssh://git@github.com/lino-framework/book.git@e1ce69aaa712956cf462498aa768d2a0c93ba5ec#egg=lino_book
-e git+git+ssh://git@github.com/lino-framework/noi.git@2e56f2d07a940a42e563cfb8db4fa7444d073e7b#egg=lino_noi
-e git+git@github.com:lino-framework/xl.git@db3875a6f7d449490537d68b08daf471a7f0e573#egg=lino_xl
lxml==3.6.4
...
Unipath==1.1
WeasyPrint==0.31
webencodings==0.5
(52) The -e
command-line switch for pip causes it to use the “development” mode.
The first argument after -e is not a project name but a path to a
directory of your local filesystem. Development mode means that these modules
run “directly from source”. pip does not copy the sources to your Python
site_packages, but instead adds a link to them.